Firstly, naming convention:
For CTM textures, you don't have to follow the vanilla naming conventions.
For the sake of ease, I chose to refer to my textures numerically, beginning with 0.png, being the base (vanilla) texture.
This is useful, because a) you provide better readability in the respective .properties files and b) you can refer to multiple textures without having to write out the name of every single one of them (more on that later).
For the .properties files, I name them after the function they're meant to serve, so if I provide a .properties file that's responsible for changing the bottom texture of a Brick double slab, I call the .properties file bricks_doubleslab_bottom.properties.
In principle, though, you can follow any naming convention that you see fit, so long as you refer to the texture names correctly in the .properties files.
.properties FilesNow. You have created your textures and now you want OptiFine to recognize and use them. This is achieved through text files with a .properties extension, as long as it's utilized properly.
matchBlocks
Firstly, you'll need to tell the file which tile (block), you want to change the texture for.
This is achieved with the matchBlocks function.
I'm told that matchTiles works aswell, but so far, working with matchBlocks has held no negative effects for me.
If someone knows a measurable difference between the two, I'll reflect that in future.
For the sake of avoiding misunderstandings, I'd recommend always refering to the wanted block in full, so modname:blockname, achieving something that looks like this:
metadata
Next, since you can't refer to specific metadata, using just matchBlocks, you will have to do this in a secondary step.
If you don't know what "Metadata" is, they are the predecessor to the later "Blockstates" and define different iterations of the same block.
For example, if a stair block is rotated to the left or right, a slab is turned upside-down or if a mossy stone brick is used instead of a regular one, the metadata reflects that.
If you don't know all metadata by heart (why would you, ever?), I recommend using WAILA or something similar to find out the metadata of the block you're looking at in-game.
Following our example from above, if we refer to a brick block of the metadata of 0, it would look like this:
Keep in mind that some seriously cursed stuff is achieved through metadata, which, on the one hand, makes you immensely powerful when dealing with textures, for example allowing you do differentiate between normal and upside-down slabs with completely different textures, but it also leads to some things being unchangable, like the side textures of doors.
faces
Because you don't always want to change all sides of a block into the same textures, CTM allows for you to specify every single texture as you see fit.
This is achieved through the faces command. You can use the following methods here:
faces=all (Changes all textures on a block.)faces=sides (Changes all side textures on a block.)faces=top (Changes the top texture on a block.)faces=bottom (Changes the bottom texture on a block.)faces=north (Changes the northern texture on a block (check the F3 screen in game).)faces=south (Changes the southern texture on a block.)faces=east (Changes the eastern texture on a block.)faces=west (Changes the western texture on a block.)
This function is necessary to change "face textures" for blocks that follow the player's facing direction when being placed, like Pumpkins or Furnaces.
A combination of metadata and faces has to be employed for this to work.
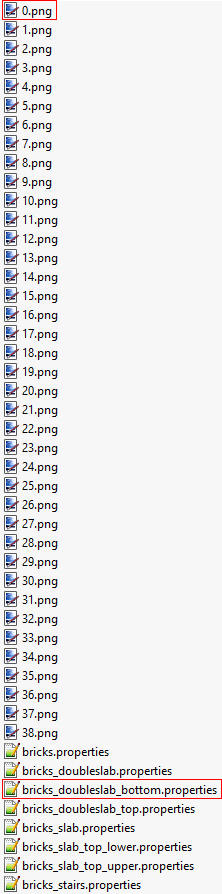
This is the reason for a lot of texture folders looking like this, because you generally cannot assign different textures in one file.
For every side of the block that you want the texture to change, and for every state of the block you want this change to apply to, you'll have to make a new file, which can lead to something like the picture below.
You can refer to multiple meta values or faces in one file, but only if you want to apply the same texture to them.
Following our example, if we want to change all faces, it would look like this:
tiles
Next, you will have to assign your created textures to this .properties file, using the tiles command.
You can refer to every texture that you created and put into this folder, but if you named them in numeric order, you can summarize them using -.
The following configurations are possible:
tiles=bricks_topside bricks_topside2 bricks_topside3 (If you named your textures.)tiles=0 (If only one texture is present.)tiles=0 1 2 3 4 5 6 7 8 9 10 (If you want to write them all out.)tiles=0 1 2 7 8 10 (If you don't want to use all provided textures.)tiles=0-10 (If you want to summarize the textures.)tiles=0-2 7-9 10 (If you want to summarize, but don't want to use all provided textures.)Following our example, if we have 25 textures to assign to our brick block, it would look like this:
weights
This function is used to define how the textures are being distributed, in terms of frequency.
Weight always works like this:
If you have 5 textures, that have the weights of 1, 2, 3, 4 and 5, respectively, texture one will be distributed 1 out of (1+2+3+4+5=15) times.
The weights don't have to add up to 100, we're not talking percentages (even though, if calculated, you could very well make out a percentage of how many times a certain texture will appear, according to its weight, but I think you get the point).
Keep in mind that you have to specify a weight value for every single texture file that you're adding, in the order they are specified in the tiles function.
Following our example, if we weight our textures differently, it would look like this:
method
This function is the most important of all the ones you've seen so far.
It defines how exactly your texture will be used, and different methods use or don't use the functions that I presented before.
The following methods are known to work:
method=fixed (This will only apply one single texture, all the time. It will only accept one tile being present in the tiles command and will ignore weights.)method=random (This command uses all the textures that are defined in tiles, weigh them in accordance with the weights function and distribute them randomly. This can also used for texture rotation, if the textures provided are rotated versions of the original texture 0.png.)method=ctm (This command is the most complex of the lot, requiring 47 different textures to be present for it to work. It's primarily used to achieve features like connected glass and similar ideas. For this to work, the textures have to be named numerically, and they have to be created according to the template provided below.)method=horizontal (This command requires 4 textures, named in numerical fashion and created according to the template below. It's used to make textures connect when the blocks are placed next to each other horizontally.)method=vertical (This command works the same as horizontal, but for vertical connection.)method=top (This command is used to connect only to the block above (I don't quite know how this works yet).)method=repeat (This command can be used to achieve even greater randomization. You define a texture that's larger than a normal block texture and this function will repeat a fixed pattern defined in said texture over multiple blocks.)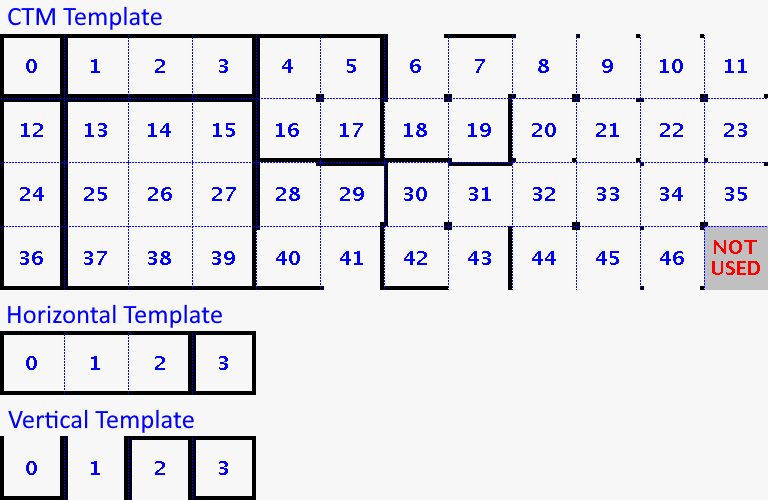
Following our example and giving it the random method, it would look like this:
biomes
This function is used to change block textures depending on the biome the block gets placed in.
It is important to note that, currently, you can only assign multiple textures to different biomes, if one of them is specifically made out to apply to all other biomes.
The biome naming conventions are a bit strange in some cases, which is why a complete list of the accepted biome names will be provided below.
For non-vanilla biomes, it's generally enough to remove the spaces in the middle of biome names to reference them in a .properties file.
Also, keep in mind that, as with all other functions biomes do not get seperated by ,!
Following our example and wanting the randomization to only apply to mesa biomes, it would look like this:
Now, randomized mob textures work a little differently than the above CTM functions.
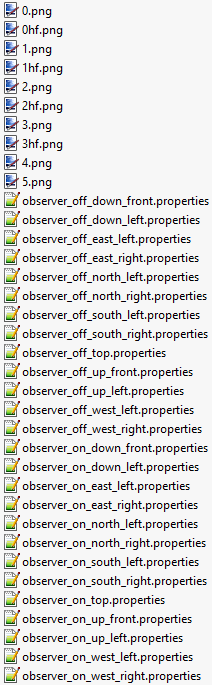
For random mob textures to work, it is actually integral to copy the folder structure of the regular mob textures in the filepath mcpatcher\mob.
In there, you will have to name them after the mob that you want to change, with a number attached to it (for example chicken.png, chicken2.png, chicken3.png and so forth).
This will lead to the effect that some mob textures will be inside their own folders and some in the actual mob folder.
To find out which textures are which, you can refer to this texture resource and check, which mob textures are just loosely dropped into the vanilla mob folder (like Squids, Chicken and Snow Golems, for example) and which have their designated folders (like Sheep, Cows or Pigs, for example).
For the .properties files, you will also have to name them after the mob that you're looking to change.
So a properties file for chicken will always have to be named chicken.properties.
For mobs that utilize more than one texture (like how Sheep use a different texture for their fur or Wolves use different texture for their angry or tamed state) it is sufficient to provide one singular .properties file, as long as you provide secondary texture files (for example sheep.png+sheep_fur.png, sheep2.png+sheep_fur2.png, sheep3.png+sheep_fur3.png and so forth).
In case you're unsure about a specific example, you can try rummaging through some of the Addons that I provide, relating to mobs.
This naming convention is not optional, it has to be kept for randomized mob textures to work!
.properties FilesSame as with CTM .properties files, you will have to fit your files with certain functions in order to make them recognize the textures you provided.
skins
The first thing you will want to do is to specify the texture that you created.
This is done through the skins function.
An important distinction between mobs and blocks is that you can ever only have one .properties file, so the textures all have to be defined in this one.
In order to give different properties to different textures, mob .properties files have a way to order the functions.
When adding a function, you will have to add a .n(with n refering to the number of the function) behind it.
Keep in mind that mob textures will always be randomized between the ones you provide.
If you only provide one, then it will stick with that, but since you generally should assign the vanilla texture as the normal, you'd just have a mob that gets randomized with the same texture all the time...
Let's say for an example you want to randomize the Chicken's textures. In that case you'll have to do the following:
biomes
Another thing that's possible, like with blocks, is to specify, in which biome the mob will have which texture.
Keep note that the textures are assigned upon loading the area (either by starting up the world or re-loading the chunks), so if you have a mob that has one texture in biome X and another in biome Y, and while you were present it travelled to a different biome, it will change its texture upon reload.
So, for the biome function, the biome names are the same as for block .properties files, refer to the list I attached above.
Following our example from before, it would look like this, if we were to randomize our chickens only in plains and sunflower plains (as with blocks, biomes are separated not by ,):
One thing to keep in mind is that, unlike blocks, it is not necessary to assign some textures for all other biomes.
You just have to order them differently here.
It is wise to assign all the mob textures for specific biomes first (using skins.1, skins.2, skins.3 and so forth) and only after that assign all the textures that should be randomized between all the other biomes.
As an example, I'll show you the .properties files I used for Chickens and Sheep.
Chickens:
This makes chicken10.png appear only in Mushroom Islands and chicken11.png only in the End dimension.
The rest (chicken.png-chicken9.png) will appear anywhere but Mushroom Islands and the End.
Sheep:
This makes sheep2.png+sheep_fur2.png appear in Ice/Cold related biomes, sheep3.png+sheep_fur3.png in Taiga biomes, sheep5.png+sheep_fur5.png in Mountain biomes and sheep.png+sheep_fur.png aswell as sheep4.png+sheep_fur4.png in all biomes that are not Cold, Taiga or Mountain related.
weights
As with blocks, you can also select weighting for mob textures.
As with all mob-related functions, weights has to be numbered aswell.
Then you have to specify a weight for all textures that you provided, same as with blocks.
Following our example from above, we could do something like this: